Are you tired of that old, leaky kitchen sink? You might be wondering, “Can I replace my kitchen sink myself?” The good news is, you don’t have to be a plumbing expert to take on this job.
With the right tools and a bit of patience, you can save money and feel proud of the work you’ve done. But before you grab your wrench, it’s important to know what to expect and how to avoid common pitfalls.
Keep reading, and you’ll discover simple steps and expert tips that make the process easier than you think. Your kitchen upgrade starts here!
Contents
Tools And Materials Needed
Replacing a kitchen sink yourself can save money and boost your confidence. Before starting, gather the right tools and materials. This step helps the job go smoothly and quickly. Having everything ready avoids delays and frustration. Below are the key items needed for the task.
Essential Tools
Basic tools make sink replacement easier and safer. A wrench set helps loosen and tighten pipes. A screwdriver is needed to remove mounting clips. A putty knife removes old sealant around the sink. A bucket catches water during disconnection. A flashlight helps see under the sink in dark spaces. Lastly, pliers grip tight fittings and small parts.
Choosing The Right Sink
Select a sink that fits your countertop hole size. Measure width, length, and depth carefully. Decide on the sink material—stainless steel or porcelain are common. Match the sink style to your kitchen decor. Check the number of basin bowls you want. Confirm the drain placement fits your plumbing setup.
Additional Supplies
Extra supplies ensure a secure and leak-free sink. Plumber’s putty seals the drain and prevents leaks. Silicone caulk seals around the sink edges. Teflon tape wraps around threaded pipe joints. New mounting clips or brackets hold the sink firmly. Replacement pipes or hoses may be needed if old ones are damaged. Keep rags handy to wipe spills and clean surfaces.

Credit: www.reddit.com
Preparing Your Workspace
Replacing a kitchen sink needs a clean and safe workspace. Preparing your area helps avoid problems later. It saves time and keeps you organized. Start by clearing the space and making sure tools are ready.
Next, cut off the water supply. This step prevents leaks and water damage. After that, remove the old sink parts carefully. These steps make the new installation smooth and easy.
Clearing The Area
Remove all items under and around the sink. Clear the countertop to have enough room. Keep tools nearby for easy access. A tidy area reduces accidents and confusion. Make sure the floor is dry and clean.
Turning Off the Water Supply
Locate the water valves under the sink. Turn them clockwise to close the water flow. Test by turning on the faucet. No water should come out. This step stops leaks and water spills.
Removing Old Sink Components
Disconnect water lines using a wrench. Unscrew the sink clips holding it in place. Carefully lift the old sink out of the countertop. Remove the drain pipes and clean the area. Save any reusable parts for later use.
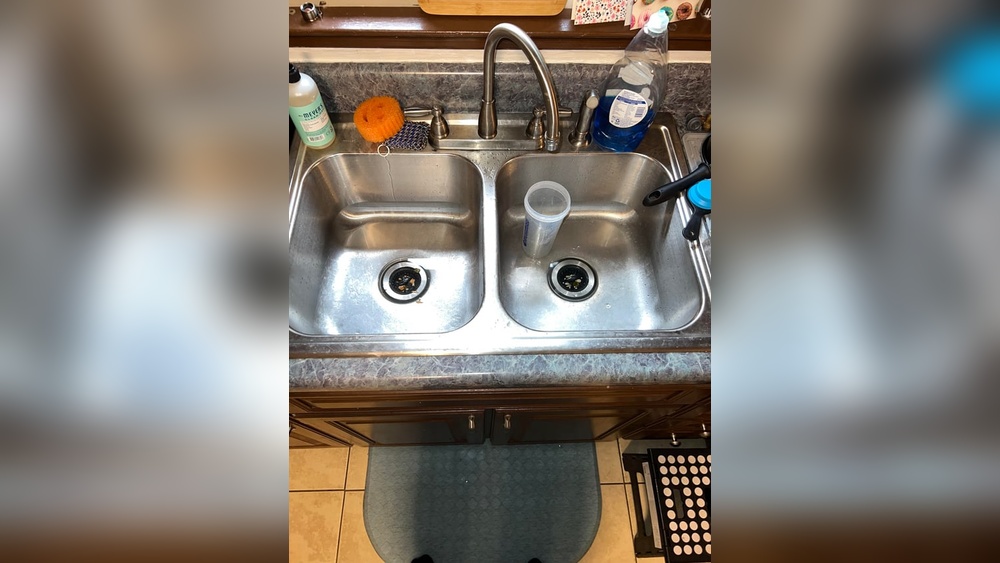
Removing The Old Sink
Removing the old kitchen sink is the first step to installing a new one. It takes some care and patience. Doing this right makes the whole project easier. You need to handle plumbing and the sink carefully. Here is how to do it step-by-step.
Disconnecting Plumbing
Turn off the water supply under the sink. Use a wrench to loosen the nuts on water pipes. Disconnect the drain pipe carefully. Keep a bucket under pipes to catch water drips. Remove the supply lines and drain pipes completely.
Taking Out The Sink
Check for clips or screws holding the sink to the countertop. Use a putty knife to cut through any sealant around the sink. Lift the sink gently out of the countertop opening. Ask for help if the sink is heavy. Clear any remaining caulk or adhesive on the edges.
Cleaning The Countertop
Remove old sealant and debris from the countertop surface. Use a scraper or putty knife to clean the area. Wipe the countertop with a damp cloth. Let the surface dry fully before installing the new sink. A clean surface helps the new sink fit better and last longer.
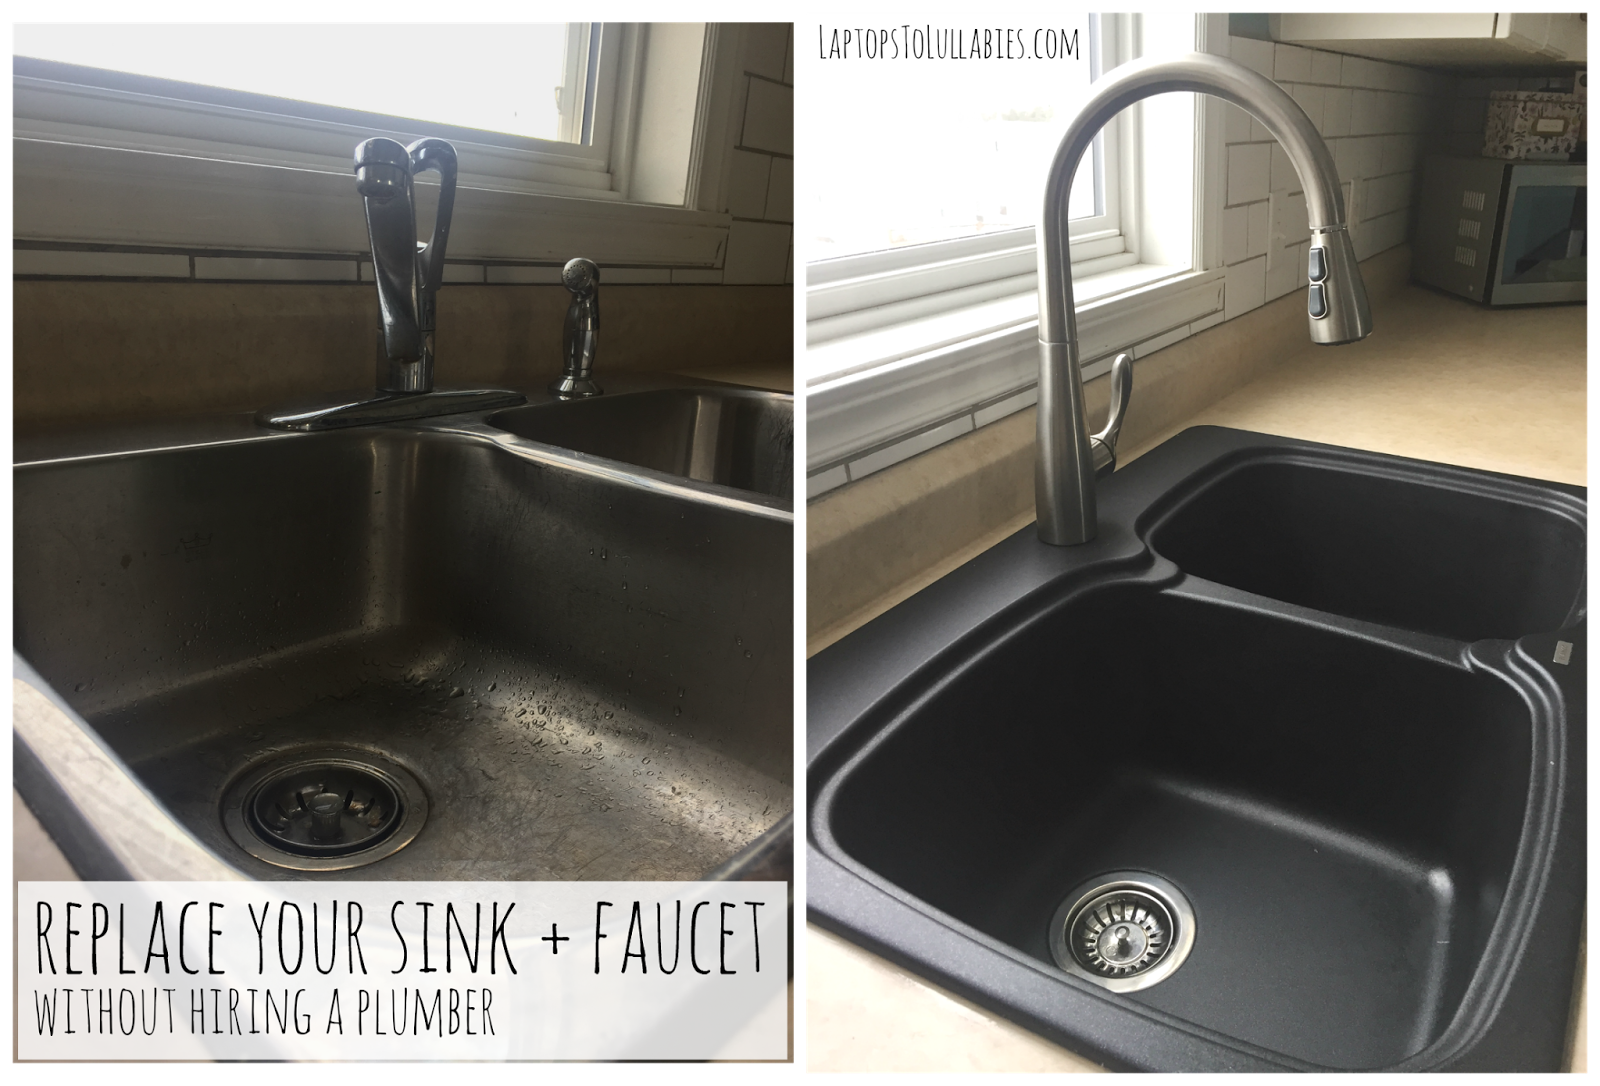
Installing The New Sink
Installing a new kitchen sink can feel like a big task. The key is to take each step slowly and carefully. This part of the project focuses on putting the sink in place, sealing it well, and reconnecting the plumbing. Doing these right ensures your sink works well and stays secure.
Placing The Sink
Start by lowering the new sink into the countertop opening. Make sure it fits snugly without forcing it. Check that the edges line up evenly all around. Adjust the sink as needed to sit flat and stable.
Sealing And Securing
Apply a bead of silicone sealant around the sink’s edge. This stops water from leaking under the sink. Press the sink firmly into the sealant. Use clips or brackets under the sink to hold it tight. Wipe away any excess sealant for a clean look.
Reconnecting Plumbing
Reconnect the drain pipes and water lines to the new sink. Tighten all connections by hand first, then use a wrench for a snug fit. Check that the water supply valves are open. Test the sink by running water and watching for leaks. Fix any drips before finishing up.
Testing And Finishing Touches
Testing and finishing touches are key steps after installing your new kitchen sink. These steps ensure your sink works well and looks great. Take time to check every part carefully. Small problems now can save big repairs later.
Checking For Leaks
Turn on the water and watch all pipes closely. Look under the sink for any drops or wet spots. Check both hot and cold water lines. Run the drain and see if water flows freely without leaks. Tighten any loose connections. Even a small leak can cause damage over time.
Adjusting Fixtures
Test the faucet handles and sprayer to make sure they move smoothly. Adjust the water pressure if it feels too strong or weak. Align the faucet so it points correctly into the sink basin. Ensure the drain stopper opens and closes properly. Make small tweaks to improve comfort and function.
Cleaning Up
Remove any tools and leftover materials from the area. Wipe down the sink and countertop to remove dust and fingerprints. Clean the drain and faucet to shine like new. Dispose of old parts and packaging safely. A clean workspace helps you enjoy your fresh kitchen sink.

Credit: www.reddit.com
Troubleshooting Common Issues
Replacing a kitchen sink can be a satisfying project. Yet, some common problems might arise. Knowing how to fix these can save time and money. Let’s explore some frequent issues you might face after installation.
Leaks And Drips
Leaks often happen around the faucet or drain. Check all connections to ensure they are tight. Use plumber’s tape on threaded joints to stop drips. Sometimes, worn-out washers or seals cause leaks. Replace these parts if needed. A small drip can cause big water damage over time.
Drainage Problems
Slow draining is a common issue after sink replacement. Debris or old putty can block pipes. Clear the drainpipe carefully to remove any clogs. Avoid harsh chemicals that may damage pipes. Make sure the drain trap is installed correctly. A proper slope in the pipes helps water flow smoothly.
Alignment Issues
Misaligned sinks can cause water to pool or leak. Check that the sink fits well in the countertop cutout. Adjust mounting clips or brackets to level the sink. Seal edges with silicone to prevent water seepage. Proper alignment ensures the sink works efficiently and looks good.
When To Call A Professional
Replacing a kitchen sink can be a satisfying DIY project. Yet, some situations need a professional’s skill. Knowing when to call an expert saves time and avoids costly mistakes. Here are some key signs that you should seek professional help.
Complex Plumbing Systems
Some kitchens have complicated plumbing setups. Multiple pipes, drains, and valves make the job hard. Mistakes can cause leaks or water damage. A plumber understands these systems well. They can handle tricky connections safely.
Structural Concerns
Old or damaged cabinets and countertops need care. Removing or installing a sink might weaken these structures. Professionals check the stability before starting. They fix or reinforce parts to avoid accidents. This ensures your kitchen stays safe and strong.
Lack Of Proper Tools
Special tools are needed to replace a sink correctly. Without them, work takes longer and risks damage. Professionals come equipped with the right tools. They work faster and get the job done right. This saves you effort and frustration.
Credit: heathershandmadelife.com
Frequently Asked Questions
Can I Replace My Kitchen Sink Without Professional Help?
Yes, you can replace your kitchen sink yourself if you have basic plumbing skills. Make sure to turn off the water supply, disconnect pipes carefully, and follow step-by-step instructions. Proper tools and patience are essential for a successful DIY sink replacement.
What Tools Do I Need To Replace A Kitchen Sink?
You will need a wrench, plumber’s putty, screwdriver, bucket, and plumber’s tape. A utility knife and pipe wrench also help. Having the right tools ensures a smooth and efficient sink replacement process, preventing damage or leaks.
How Long Does It Take To Replace A Kitchen Sink?
Typically, replacing a kitchen sink takes 2 to 4 hours. The time depends on your experience, sink type, and plumbing complexity. Taking your time helps avoid mistakes and ensures all connections are secure.
What Common Problems Occur During Sink Replacement?
Common issues include leaks, improper sealing, and pipe misalignment. Also, incorrect sink measurements can cause fitting problems. Careful preparation, correct tools, and following instructions minimize these risks for a successful installation.
Conclusion
Replacing a kitchen sink yourself can save money and feel rewarding. Basic tools and careful steps make the job easier. Take time to measure and check parts before starting. Expect some challenges, but stay patient and focused. If unsure, asking for help is smart and safe.
A well-done sink replacement improves your kitchen’s look and function. Give it a try and learn something new today.