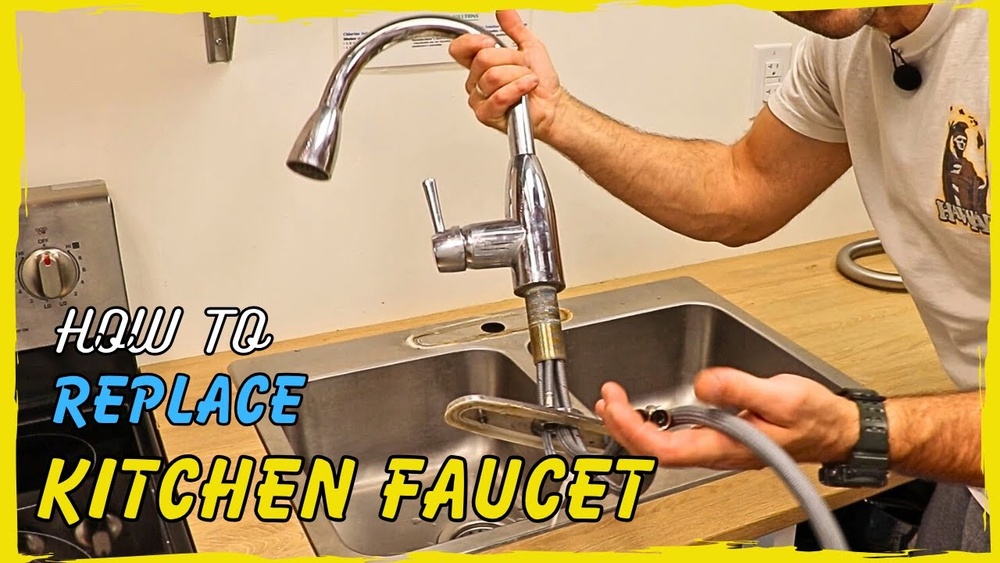
Are you tired of your old, leaky kitchen sink faucet? Changing it might seem tricky, but it’s easier than you think.
Imagine upgrading your kitchen with a fresh, stylish faucet that works perfectly every time. In this guide, you’ll learn simple, step-by-step instructions to replace your faucet quickly and without stress. By the end, you’ll have the confidence to tackle this project yourself and enjoy a better kitchen experience.
Ready to get started? Let’s dive in!
Contents
Gather Tools And Materials
Before starting to change a kitchen sink faucet, gather all needed tools and materials. Having everything ready saves time and reduces frustration. It helps you work smoothly and finish the job faster.
Essential Tools Needed
Prepare a basin wrench for tight spaces under the sink. Use an adjustable wrench to loosen nuts and bolts. A screwdriver, both flathead and Phillips, is useful for removing and installing parts. Have plumber’s tape to seal pipe threads and prevent leaks. A bucket or bowl helps catch water during removal. Also, keep a towel nearby to wipe spills.
Choosing The Right Faucet
Select a faucet that fits your sink’s hole pattern. Measure the number of holes and their spacing before buying. Pick a faucet that matches your kitchen style and finish. Consider single-handle faucets for easy control or double-handle faucets for separate hot and cold water. Make sure the faucet’s height and reach suit your sink size. Check if it includes necessary parts like mounting hardware and supply lines.
Turn Off Water Supply
Turning off the water supply is the first step to change a kitchen sink faucet safely. It stops water flow and prevents leaks or flooding. This step is simple but very important for a smooth faucet replacement.
Before you start, make sure you know where to find the water valves. Also, drain any water left in the pipes to avoid spills. These small tasks save time and keep your workspace dry.
Locate Shutoff Valves
Look under the kitchen sink for two small valves. One controls hot water, the other cold. They are usually round or oval knobs.
Turn each valve clockwise to close it. This stops water from flowing to the faucet. If there are no valves under the sink, try turning off the main water supply to the house.
Drain Remaining Water
After closing the valves, open the faucet. Let all the water drain out. This releases pressure in the pipes.
Keep the faucet open until no more water flows. This step prevents leaks while you remove the old faucet. It also makes the job cleaner and easier.
Remove Old Faucet
Removing the old faucet is the first step in installing a new kitchen sink faucet. This process clears the workspace and prepares your sink for the new fixture. Follow these simple steps to take out the old faucet safely and easily.
Disconnect Water Lines
Start by turning off the water supply under the sink. Use a wrench to loosen the nuts on the water lines. Carefully disconnect the hot and cold water lines from the faucet. Have a towel ready to catch any leftover water. This step stops water flow and prevents leaks.
Unscrew Mounting Nuts
Look under the sink for the mounting nuts holding the faucet in place. Use a basin wrench or regular wrench to unscrew these nuts. Turn them counterclockwise until they come free. Be patient; these nuts can be tight or hard to reach.
Lift Out Old Faucet
Once the mounting nuts are loose, lift the old faucet straight up. Wiggle it gently if it feels stuck. Remove any old putty or sealant left on the sink surface. Clean the area to prepare for the new faucet installation.

Credit: www.instructables.com
Prepare Sink Area
Preparing the sink area is an important step before changing a kitchen sink faucet. It helps ensure a smooth installation and prevents future problems. Taking time to clean and inspect the space lays a solid foundation for your work.
Clean Mounting Surface
Start by removing any old putty, dirt, or debris from the sink’s mounting surface. Use a gentle cleaner and a cloth to wipe the area thoroughly. A clean surface helps the new faucet seal properly. It also prevents leaks and damage to the sink.
Inspect For Damage
Check the sink area for cracks, rust, or other signs of damage. Look closely at the mounting holes and the surrounding surface. Any damage may affect how the new faucet fits or holds. Fix small problems before installing to avoid bigger issues later.
Install New Faucet
Installing a new kitchen faucet is a key step after removing the old one. It sets the foundation for proper function and a neat look. Careful placement and secure fastening ensure your faucet stays put without leaks or wobbling.
This section guides you through positioning and securing the new faucet. Follow these steps to complete the installation smoothly.
Position the Faucet Correctly
Place the faucet base over the sink holes. Align it so the handles and spout face the right way. Check that the faucet sits flat on the sink surface. Adjust slightly if it feels uneven. Proper position prevents water from pooling under the faucet.
Secure Mounting Hardware
Under the sink, thread the mounting nuts onto the faucet bolts. Hand-tighten them first to hold the faucet in place. Use a basin wrench or adjustable wrench to tighten the nuts firmly. Avoid over-tightening to prevent damage to the sink or faucet. Make sure the faucet does not move or tilt. Tight mounting keeps the faucet stable during use.

Credit: www.homedepot.com
Connect Water Supply Lines
Connecting the water supply lines is a key step in changing your kitchen sink faucet. This process links your new faucet to the home’s water system. Proper connection ensures water flows correctly and avoids leaks.
Take your time with this step. Tight connections keep your faucet working well for years. Use the right tools and parts. This helps prevent damage to the pipes and fittings.
Attach Hot And Cold Lines
Start by identifying the hot and cold water lines. Usually, the hot water line is on the left and the cold on the right. Attach each supply line to the correct faucet inlet. Hand-tighten the nuts first. Use a wrench to snug them, but avoid over-tightening. Over-tightening can damage threads or cause leaks.
Check For Proper Fit
After attaching, check each connection for a proper fit. Make sure the lines are secure and straight. Look for gaps or cross-threading. Turn on the water supply slowly. Watch closely for leaks around the connections. If you see drips, tighten the fittings slightly. Proper fit stops leaks and keeps water flowing smoothly.
Test Faucet For Leaks
Testing your new kitchen sink faucet for leaks is a vital step after installation. It ensures no water escapes and prevents damage to cabinets or floors. A quick and careful check saves time and money later.
Turn On the Water Supply
Start by turning the water supply valves under the sink. Open both hot and cold valves slowly. Watch the faucet as water begins to flow out. Make sure the water pressure feels steady and normal.
Inspect Connections
Look closely at all faucet connections under the sink. Check the water supply lines and faucet base. Look for any signs of water dripping or wet spots. Use a flashlight to see tight areas clearly.
Fix Any Leaks
If you find leaks, tighten the connections gently with a wrench. Avoid over-tightening to prevent damage. Replace washers or tape if leaks continue. Repeat the inspection until all leaks stop.

Credit: www.youtube.com
Clean Up Workspace
Cleaning up your workspace after changing a kitchen sink faucet helps keep the area safe and neat. A tidy space prevents accidents and makes your kitchen look good. It also protects your new faucet from dirt and damage. Follow these simple steps to clean up quickly and effectively.
Remove Tools And Debris
Collect all the tools you used for the job. Put them back in their storage place. Pick up any small parts or screws left on the floor or counter. Throw away any trash like old washers or packaging. Clearing the area of tools and debris stops clutter and hazards.
Wipe Down Sink Area
Use a clean cloth or sponge to wipe the sink and countertop. Remove water spots, dust, and fingerprints. Clean around the faucet base to remove any loosened dirt. Dry the surface with a soft towel to avoid streaks. A clean sink area keeps your kitchen fresh and ready to use.
Frequently Asked Questions
How Do I Prepare To Change A Kitchen Sink Faucet?
First, turn off the water supply under the sink. Next, clear the area and gather necessary tools like a wrench. Disconnect the water lines and remove the old faucet carefully. Preparation ensures a smooth faucet replacement process.
What Tools Are Needed To Replace A Kitchen Faucet?
You need an adjustable wrench, basin wrench, plumber’s putty, and screwdriver. These tools help loosen connections, secure the faucet, and seal joints. Having them ready speeds up the faucet replacement and prevents damage.
How Long Does It Take To Change A Kitchen Faucet?
Typically, it takes 30 to 60 minutes for a DIY faucet replacement. Time varies based on faucet type and your experience level. Proper preparation and following the steps reduce installation time effectively.
Can I Replace A Faucet Without Professional Help?
Yes, most kitchen faucets can be replaced by homeowners with basic tools. Follow instructions carefully and ensure water is off. If unsure, consult tutorials or a professional to avoid damage.
Conclusion
Changing a kitchen sink faucet is easier than it seems. With the right tools and steps, anyone can do it. Take your time and follow each step carefully. Check for leaks before finishing the job. A new faucet can improve your kitchen’s look and function.
Enjoy the satisfaction of a task well done. Keep your workspace clean and safe throughout the process. This simple upgrade brings fresh style and convenience to your home. Try it yourself and feel proud of the result.