Your kitchen sink is one of the busiest spots in your home. It handles everything from washing dishes to prepping meals, making it a hotspot for dirt, grime, and germs.
But keeping it clean doesn’t have to be a chore. Imagine a sink that sparkles every time you look at it and feels fresh whenever you touch it. In this guide, you’ll discover simple, effective ways to clean your kitchen sink quickly and thoroughly.
Ready to transform your sink into a shining centerpiece of your kitchen? Let’s dive in and get started!
Credit: www.liquidplumr.com
Contents
Gathering Cleaning Supplies
Gathering the right cleaning supplies is the first step to a spotless kitchen sink. Having everything ready makes the cleaning quick and easy. It also helps you clean deeply without missing spots.
Choose supplies that work well on your sink type. Some materials need gentle care. Others can handle stronger cleaners. Knowing what you need saves time and effort.
Essential Cleaning Tools
Start with a soft sponge or cloth. Avoid rough scrubbers that can scratch surfaces. A small brush helps clean hard-to-reach corners and drains. Gloves protect your hands from harsh chemicals.
Effective Cleaning Products
Use mild dish soap for daily cleaning. Baking soda acts as a natural scrubber for tough stains. White vinegar helps remove mineral deposits and disinfects. Avoid bleach on delicate surfaces.
Optional Supplies For Deep Cleaning
Lemon juice freshens and brightens the sink naturally. A toothbrush works well for cleaning faucet edges. A microfiber cloth finishes the job by drying and shining the sink.
Preparing The Sink
Preparing the sink is the first step to clean it well. This step clears the area and makes cleaning easier. A clean and empty sink helps you see dirt and grime better. It also stops water from splashing on items around.
Remove Dishes And Debris
Take out all dishes, utensils, and food scraps from the sink. Check the drain for any bits of leftover food. These bits can block the drain and cause bad smells. Use a paper towel to wipe away any loose crumbs.
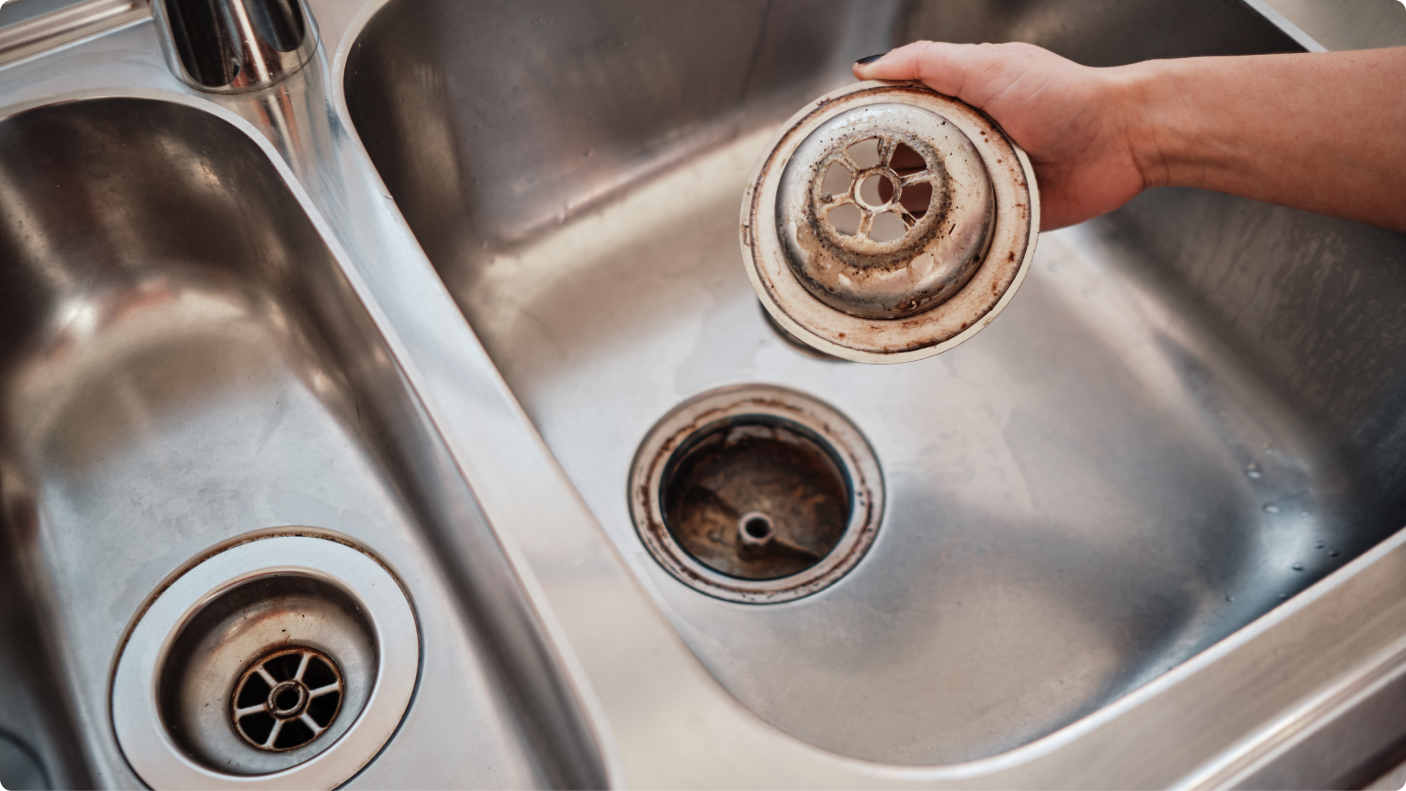
Clear The Drain And Garbage Disposal
Look inside the drain for any stuck particles. Remove them by hand or with tweezers. If you have a garbage disposal, run cold water and turn it on briefly. This helps clear small bits and freshens the disposal.
Rinse The Sink Thoroughly
Use warm water to rinse the whole sink basin. This removes loose dirt and makes cleaning products work better. Let the water run for a minute to wash away soap or food stains.
Removing Food Debris
Removing food debris from your kitchen sink is important to keep it clean and fresh. Food scraps can block drains and cause bad smells. Cleaning out these bits makes your sink more hygienic and pleasant to use.
Regular removal of food debris helps prevent clogs. It also stops bacteria from growing. This keeps your kitchen safer for cooking and washing dishes.
Clear Out Large Food Pieces
Start by removing any big food scraps by hand. Use gloves if you want to avoid touching dirty bits. Throw these scraps into the trash or compost bin. This prevents buildup in the sink drain.
Use A Sink Strainer
Place a sink strainer in the drain opening. It catches leftover food particles while you wash dishes. Empty the strainer often to avoid clogging. This simple tool saves time and keeps your sink clean.
Rinse With Hot Water
After clearing debris, rinse the sink with hot water. Hot water helps wash away small food particles. It also loosens grease stuck to the drain. Pour water slowly to push debris down the pipes.

Credit: www.washingtonpost.com
Choosing The Right Cleaner
Choosing the right cleaner is key to keeping your kitchen sink spotless and safe. Different sinks need different care. Some cleaners work better on certain materials. Picking the right product helps avoid damage and gives a better clean. Here are two main types of cleaners to consider.
Natural Cleaners
Natural cleaners are gentle on your sink and the environment. They use ingredients like vinegar, baking soda, and lemon juice. These items remove stains and kill germs without harsh chemicals. They are safe for most sink materials, including stainless steel and porcelain. Natural cleaners also reduce bad odors effectively. Mixing baking soda with vinegar creates a fizzing action that lifts dirt. Lemon juice brightens the surface and leaves a fresh scent. These cleaners are affordable and easy to find at home.
Commercial Cleaners
Commercial cleaners are made specifically for tougher stains and heavy use. They often contain strong ingredients to remove grease and grime fast. Some products work well on hard water spots and rust. Always check the label to match the cleaner with your sink type. Using the wrong cleaner can cause scratches or dull finishes. Follow the instructions carefully for the best results. Wearing gloves protects your skin from harsh chemicals. Store these cleaners safely away from children and pets.
Scrubbing Techniques
Scrubbing is a key step to clean a kitchen sink well. It helps remove stains, food bits, and germs. Using the right tools and methods makes scrubbing easier and more effective. Below are two common scrubbing techniques using different tools.
Using A Sponge
A sponge works great for everyday cleaning. It holds soap and water well. Use the soft side for gentle scrubbing to avoid scratches. The rough side helps remove tough grime. Move the sponge in circles to lift dirt. Rinse the sponge often to keep it clean. Replace sponges every few weeks to avoid bacteria buildup.
Using A Brush
A brush is perfect for hard-to-reach spots and heavy stains. Choose a brush with stiff bristles for strong scrubbing power. Scrub around the drain and corners where dirt hides. Use back-and-forth strokes to break down grime. Rinse the brush after use and let it dry. Brushes last longer than sponges and clean better in tight spaces.
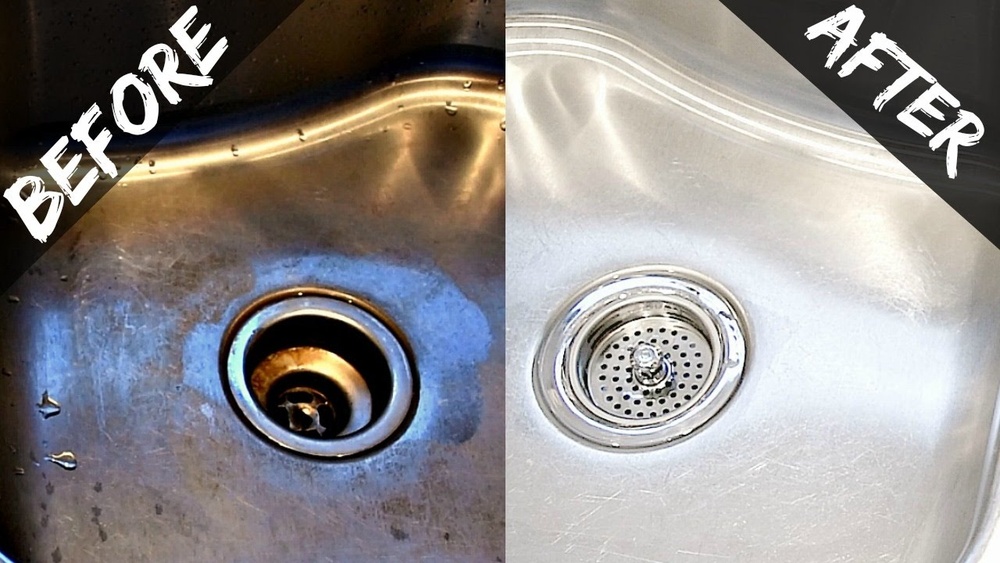
Cleaning The Drain And Faucet
Cleaning the drain and faucet keeps your kitchen sink fresh and working well. Dirt and grease build up in these areas fast. This causes bad smells and slow water flow. Regular cleaning stops these problems. It also helps your sink last longer and look nice.
Cleaning The Drain
Start by removing any visible debris in the drain. Use a pair of gloves and a small brush. Scrub inside the drain opening to clear grime. Pour a mix of baking soda and vinegar down the drain. Let it bubble for five to ten minutes. Then rinse with hot water. This helps remove clogs and kills bacteria.
Cleaning The Faucet
Wipe the faucet with a soft cloth dipped in warm soapy water. Use an old toothbrush to clean around the base and handles. For hard water spots, apply white vinegar on a cloth. Rub the spots gently until they disappear. Rinse with clean water and dry with a soft towel. This keeps the faucet shiny and free of buildup.
Rinsing And Drying
Rinsing and drying are important steps after cleaning your kitchen sink. They help remove leftover soap and dirt. These steps also stop water spots and stains. A clean and dry sink looks fresh and lasts longer.
Rinsing With Warm Water
Use warm water to rinse the entire sink. Warm water helps dissolve soap and grime faster. Pour water over all surfaces, including corners and edges. Make sure no cleaning residue stays behind. This step keeps the sink shiny and clean.
Using A Soft Cloth For Drying
After rinsing, dry the sink with a soft cloth. A microfiber towel works best. It soaks up water without scratching the surface. Drying stops water spots from forming. Wipe gently to keep the sink smooth and polished.
Drying Hard-to-reach Areas
Pay attention to the faucet base and drain areas. Use a small cloth or cotton swab for these spots. Remove any trapped water to prevent mold and stains. Keeping these areas dry keeps the sink hygienic and neat.
Credit: www.youtube.com
Maintaining A Sparkling Sink
A clean kitchen sink makes your whole kitchen feel fresh. It stops germs and smells from building up. Keeping your sink shiny is easier than you think. Just a few simple steps daily and weekly help a lot. These habits keep your sink looking bright and smelling nice all the time.
Daily Habits
Rinse your sink after each use. Use warm water to wash away food bits. Wipe the sink dry with a soft cloth. This stops water spots and stains from forming. Clean the drain area to remove any stuck dirt. Avoid leaving dirty dishes or food scraps in the sink. These small actions keep your sink neat every day.
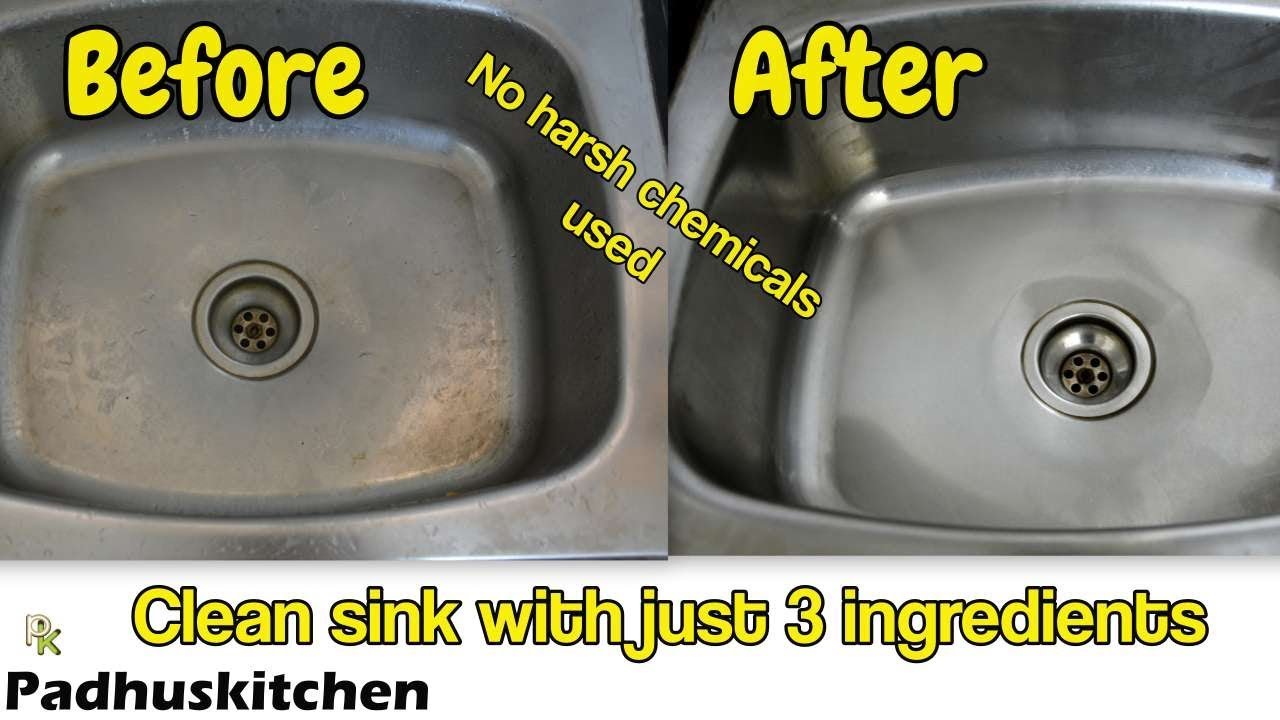
Weekly Deep Cleaning
Once a week, give your sink a deep clean. Use a gentle cleaner safe for your sink type. Scrub the basin with a soft sponge or brush. Clean around the faucet and drain thoroughly. Flush the drain with hot water to clear buildup. Rinse and dry the sink well to prevent water marks. Deep cleaning stops stains and keeps your sink sparkling.
Frequently Asked Questions
How Often Should I Clean My Kitchen Sink?
Clean your kitchen sink daily to prevent bacteria buildup. A weekly deep clean removes stains and grime, keeping it hygienic and shiny.
What Is The Best Natural Cleaner For Kitchen Sinks?
Baking soda and vinegar are excellent natural cleaners. They effectively remove stains and kill germs without harsh chemicals.
How Do I Remove Hard Water Stains From My Sink?
Use lemon juice or white vinegar on hard water stains. Let it sit for 10 minutes, then scrub gently with a soft cloth.
Can I Use Bleach To Clean My Kitchen Sink?
Yes, but use bleach sparingly. Dilute it with water and rinse thoroughly to avoid damaging the sink surface.
Conclusion
Keeping your kitchen sink clean is simple and important. Regular cleaning stops germs and keeps your sink shiny. Use basic tools like a sponge, baking soda, and vinegar for best results. Clean your sink at least once a week to avoid buildup.
A clean sink makes your kitchen look fresh and healthy. Small daily efforts can save you from tough stains later. Start today and enjoy a brighter kitchen space every day.